
Studio
You can generate a barcode sheet within Studio to use with your Capture devices. Generating your own barcode sheets is an important part in developing your very own end-to-end workflow. We want to make sure you are in the control seat! This process is similarly to the same feature in Commerce.
|
|
Tip: The Subject Barcode Sheets feature can be accessed in Studio in either the Session's list view or when viewing the list of Subjects in a Session. |
Create a Subject Barcode Sheet
- In the Session List view within Studio, click the red menu arrow to the right of the Open Session/Close Session button and click Generate Subject Barcode Sheet:
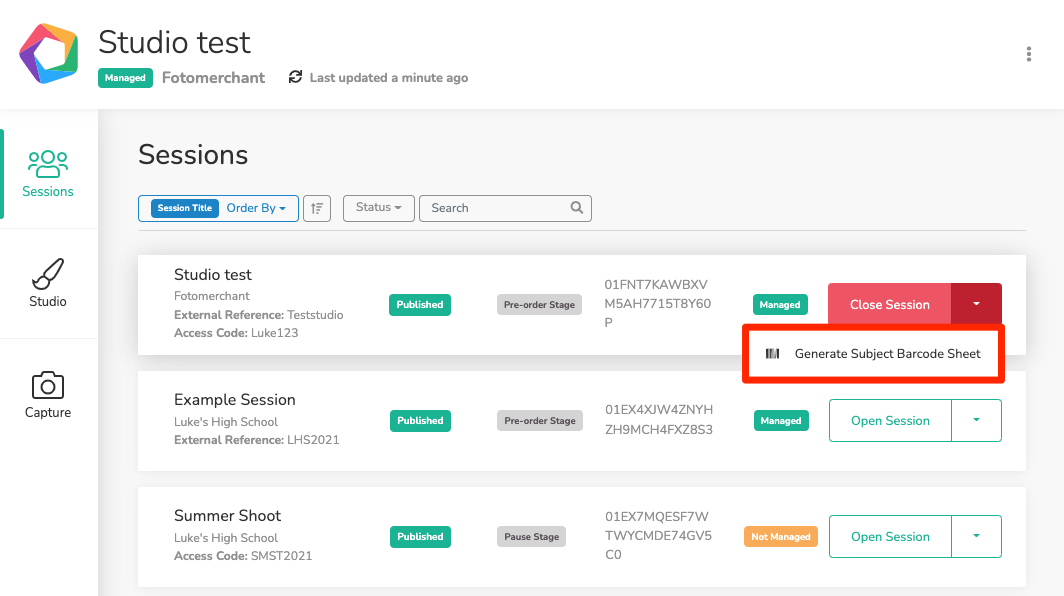
- Fill out the details for the new Generate Subject Barcode Sheet:
-
- Layout Choice: Here you can select if you want a bar code or a QR code, as well as the size preference. The larger the QR or barcode, the more information is held in them.
- Barcode Format: (only appears if the barcode option is selected) This allows you to choose the format of your barcode.
- Sort By: This determines how your codes will be sorted. This can be any of the data that you have connected with your subjects, such as Last name, Teacher, grade etc.
- Group By: This determines the grouping of the codes. Sort by could be by last name and then you can group sections of subjects by teacher or grade etc here.
- Page Break: (optional, if using Group By) This allows you to have each group show up on separate sheets.
- Subject Data: Here you can add additional information under your code to help identify the codes, this can be any data that is connected to the subject. The subject name, password and session will automatically show under the bar code, so do not need to be added here.
-
- Once you have made your selections, click the green Download button. You can also choose to immediately open the sheet by clicking the arrow, then Download and Open. Nifty.